Tuesday, March 2, 2021

Webroot: The Top-Performing Cybersecurity Company

Webroot Inc. is one of the top-performing cybersecurity companies that provides comprehensive security solutions for both consumers and businesses. It was founded in Boulder, Colorado, the US, and its headquarter is situated in Broomfield, Colorado.

In the year 2019, Opentext, being a leading name in Enterprise Information management, acquired Webroot and its parent Company Carbonite. This decision of Opentext made them a great team to lead the market of cyber resilience by offering the users total endpoint protection and disaster recovery for all size businesses.

History of Webroot

The year 1997

Steven Thomas and Kristen Talley founded their flagship product, a trace removal agent named Webroot Window Washer. It was helpful in removing the traces of online activity and allowing customers to erase files securely, and wiping systems as per requirements.

The year 2002

Webroot introduced its first-ever spyware blocking removal tool, the Spy Sweeper.

The year 2004

Webroot took entry into the enterprise market in the year 2004 by launching the Webroot® Spy Sweeper Enterprise, that enhanced Spy Sweeper to give authority to the admins to deploy antispyware protection across a complete corporate networking environment.

The year 2006

It was an important year for Webroot as the Spy Sweeper Product for the residential users got an exclusive addition of an Antivirus component.

The year 2007

The company came with an excellent feature to protect the firewall of your devices, a brand new firewall protection feature along with the Webroot Antivirus with AntiSpyware and Desktop Firewall.

The year 2008

The launch of Webroot’s first consumer security suite, Webroot Internet Security Essentials, in the US.

The year 2009

Webroot crossed the 10-million mark on protected homes user policies or endpoints.

The year 2010

The founder of BrightCloud and popular rocket scientist Hal Jonas was appointed as the CTO of Webroot after the company acquired BrightCloud and PervX.

The year 2011

This year was a great success for Webroot after it launched the first completely cloud-based cybersecurity solution in the market: Webroot SecureAnywhere protection for residential users. This quick, lightweight protection has continued to overtake the products in competition in the PassMark performance report and has also got the PCMag Editors choice award for the same year.

The year 2012

Another great year for Webroot as their next-generation Webroot Business Endpoint Protection became an award-winning product. It was named as the bronze prize holder for Innovative Services at the Edison Awards.

The year 2014

The launch of Webroot’s tailor-made online management console for MSPs, the Webroot Global Site Manager, was a great move by Webroot. It gives admins the authority to make changes in all Webroot protection from any particular location, also for a lot of clients and locations.

The year 2016

It was the time for Webroot to facilitate the enhancement of its ability to locate the proliferation of IoT devices, smart cities and gradually improve complex systems.

The year 2017

In this year, Webroot again came with an exceptional product launch; this time, it was Webroot DNS Protection that helps in protecting the businesses, employees, their customers, and guest WiFi users from the effect of DNS-based attacks enforce acceptable use policies, and managing bandwidth.

From the Year 2018 till now

The Webroot has improved a lot in the past few years and shows its participation as a leader in the fight against the gradually increasing cybercrimes and other data thefts. It has emerged as the number 1 provider of comprehensive cyber threats intelligence and cybersecurity for technology users, MSPs, form all-size businesses, and home users.       

Why Should You Use Webroot Protection?

Most of the antivirus security providers give fake promises about how they are utilizing AI and machine learning. While Webroot is actually evolving that type of technology in a secure way before it was well-known. Some of the interesting facts are that Webroot is:

  • Providing protection for the networks worldwide since 1997.
  • Making successful efforts every time to innovate, refine, and apply machine learning since the year 2007.
  • Offering cloud-based protection since 2011.

Opting for Webroot ensures that you’re in good hands, as Webroot’s year of excellence and expertise to you and your family protected from outrageous cyber crimes and threats.

Webroot is ISO-certified antivirus software, and all the activities here are pursued under compliance with ISO/IEC 27001:2013, well known as ISO 27001.

The most common activities people perform in their daily routine like shopping, banking, and financial planning in their online life over the internet, cybersecurity stakes will grow gradually, and the requirement for security solutions will also take a boost. Webroot helps you in defending your critical information, such as username, account credentials, passwords, etc., from suspicious websites.

Some of the comprehensive features Webroot offers for its users are:

  • Identity and Privacy Shields

  • Anti-Phishing Technology
  • Infrared Defence
  • Outbound Firewall
  • Protection for Android and iOS smartphones and tablets
  • System Optimizer
  • Protects your login credentials
  • Lightning-fast scans

Webroot offers you an extensive range of advanced security solutions to keep your devices protected from various cyber threats, malware, viruses, ransomware, etc. You can choose any of the security products offered by Webroot Inc. according to your requirements. Each of the security products provides essential features to protect your online life from outrageous cyber threats.

Source: Software Blogs Web

Wednesday, February 24, 2021

Things you should know ahead of migrating to the Latest FreshBooks


The latest FreshBooks has been restructured from the ground up, with about 250 additional features to help you run your business efficiently. The following steps are given below on how to migrate and the lasting improvements that have happened, and what is freshly built in the FreshBooks.

Ahead of Migration Process

Experts always suggest reviewing some important mentioned below and saving any of these in case you think they can help you begin with your migration:

Subscription Cost-  Your FreshBooks subscription stays the same.

API Connections-Automated-Bills- Please reach out to newapi@freshbooks.com to make sure your API calls will keep up to work post-migration.

Custom Email Templates- In case you have custom email templates for your emails transferred from FreshBooks, then save copies of your frequently used templates somewhere - you can re-type them in the latest Emails & Templates section.

Due Dates- When you opt to migrate to Freshbooks, all your invoices will automatically have Due Dates and be due to 20 days from the Date of Issue on your Invoices- it can be managed later.

Sent Invoices- The invoices you have sent your Clients, and when reading it thoroughly, they will come across the emailed link that works and reflects the latest FreshBooks invoice style instead. In case your Clients want to store all received Invoices in a single space ( including the additional features), they can also create Client Accounts on the latest FreshBooks.

How to Migrate

Opting to Freshbooks will take a very short time period. In case you have any specific big projects with substantial time entries logged in them, it can bring about half an hour to display as part of the migration process.

In case you have received an email from FreshBooks has been moved over:

  • Open your email program, tap on the Get Started in New FreshBooks (you may have to open the link in an incognito tab or private browsing window.)
  • Then, on the new login page at my.freshbooks.com that comes on the screen, in case you are getting several on-screen alerts or instructions to type a new password (or you re-use the same one as long as it’s eight characters or more)
  • Tap the cursor on the Sign In button, and you’ll be redirected to your account, and there you can see your business again.
  • Afterward, feel free to continue over to the Welcome to the latest Freshbooks section of this article to get oriented.

In case you want to migrate independently:

  • Sign in to your account.

  • Hover the cursor over towards your account's right corner, tap on the Exp[lore the latest FreshBooks button.
  • You will be redirected to the Migration Hub; tap the cursor over the green Start My Move button - feel free to navigate away or close the browser; the migration process will continue in the background until its completion.
  • In case you don’t have an existing account on the latest FreshBooks in the past, your account will be migrated to the latest Freshbooks, and you can again take over your business. Your new Sign-in will be at https://my.freshbooks.com
  • In case you have an existing account on the latest FreshBooks before, a confirmation mail will be sent to your email id on your account - in the emails tab. Click on the Switch to the Latest FreshBooks Now button.
    • Once you reach the new sign-in page at https://myfreshbooks.com that comes on your screen, in case you get the on-screen instructions or alerts to type a new password (or you re-use the same one as long as it’s eight characters or more)
    • Tap on the Log In option, and you’ll be redirected to your account, where you can again take your business again.
  • Then feel free to head over to the Welcome to the latest FreshBooks section of this article to get oriented.

The Migration Process

While moving to the latest FreshBooks, in case you have team members, they’ll also be moved along with you.

Migrating Your Accountant

Your accountant will be move with automatically as soon as you complete your migration with your business.

  • Accountants can Sign-in directly at the same sign-in page as you at https://my.freshbooks.com.

  • In case your accountant has not accepted a previously sent invite, you may require to re-invite them again with the correct instructions.
  • To help your accountant get started with the latest FreshBooks, share this article with them.

Migrating Your Contractors

Your Contractors will be questioned to migrate to the latest FreshBooks at the same time you migrate your business’ account. This way, your business can continue to feature with your Contractors and also different clients they may have.

  • Contractors can Sign-In directly at the same Sign-In page as you at https://my.freshbooks.com after migration and read this guide to get started.
  • Contractors’ time details will not show in your account until the Contractor has finished migrating first.

Migrating Your Staff

All Staff (including archived and deleted Staff) will be moved automatically once you’ve completed your migration with your business.

  • Staff can Sign-In directly at the same Sign-In page as you at https://my.freshbooks.com after migration.

  • All Staff will require a unique email id in the latest FreshBooks; In case any of your Staff has the same email id, you will get the notifications to update the email id and re-invite these Staff.
  • You can observe multiple roles for Team Members in the latest FreshBooks; in case your Staff has authority to prepare invoices, they’ll be allocated as Managers, or else they will be allocated as Employees. Team Members’ roles can vary according to your needs.
  • To help your Team Members understand the new FreshBooks, ask them to take a look at resources particularly used to their role.

Migrating Your API

  • Review your API with the help of API documentation for migration to make sure your calls will continue to work after migration; those associated with Projects, Tasks, and Time records will require small variations as marked in the API documentation.

  • Visit newapi@freshbooks.com in case you have any queries or want to check whether your calls will continue to work.

Migrating with Unsupported Online Payment

  • In case you have used Virtual Terminal, you can opt Advanced Payments option in the all-new FreshBooks Payments (3.5% + $0.30 per transaction) in the latest FreshBooks; instead, it includes the latest features such as save your credit cards to Client Profiles.
  • Authorize.Net and Braintree are not available in the latest FreshBooks.
  • PayPal is supported in the all-new FreshBooks, but the transaction fees vary according to your location.

Things Not Available in the latest FreshBooks

These features are currently not available in the latest FreshBooks:

  • Authorize.Net and Braintree - There are several other Payments Gateways available in the latest FreshBooks.

  • Bank Connectivity - You will get the option to reconnect with one of the three Bank Import partners.
  • Card Reader - As an alternative, use Advanced Payments on iOS, or Square can be connected to FreshBooks through Zapier
  • Customized Email Templates - Customize your templates again after you migrate.
  • Integrations & API - Connect your integrations once again as the migration completes (in case you are using API calls, please contact newapi@freshbooks.com)
  • Late Payment Reminders - With the latest Due Dates feature, your invoices will be 30 days due automatically right from the date of issue.
  • Reply-To Address - Emails in NFB are sent from the one who creates the Invoice.
  • Support & Documents - Instead, consider Support Ticket integrations and file storage options such as Google Drive, Dropbox, and more.

Tuesday, February 23, 2021

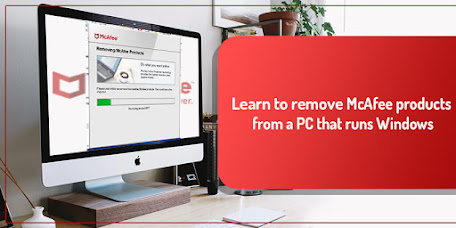
Learn to remove McAfee products from a PC that runs Windows


The instructions given below in this article will help you learn to remove or uninstall your McAfee software from a PC running Windows by following several standard Windows removal steps. In case you have an issue with removal, you might have to run the McAfee Consumer Product Removal Tool (MCPR). The instructions for the MCPR tool are also given below.

In case your McAfee product was preinstalled on your PC:

You must activate your McAfee subscription ahead of making an attempt to remove your McAfee product. This action makes sure that you have the authority to use the product without having to purchase a new subscription.

Steps to activate the McAfee security product which you have got preinstalled on your computer:

Launch the McAfee software and then try to access your account to check your subscription details. Follow these steps to access your account:

  • Launch your McAfee security product.
  • Tap the settings gear icon available on the top-right corner of the window interface.
  • In the My info, tap the cursor on My account.
  • You will be redirected to McAfee’s official website. Follow the various instructions below to continue with the process.

On McAfee’s homepage, enter your email address, and then tap Next.

In case you have an existing McAfee account, then log into your account as usual.

  • In case you don’t have an existing account, then you will have to create a new one and then tap the cursor on Next.

When you are signed into your account, follow the on-screen instructions to complete your McAfee software activation process.

Now, double-tap the McAfee icon in the notification space at the bottom of your Windows desktop near the clock. Then, tap the Verify Subscription.

Wait for the completion of this process, and the moment it’s done, your McAfee software and subscription details will be synced.

Follow the detailed instructions to remove your McAfee product. Use technique one first and if Technique 1 fails, use Technique 2.

Technique 1: Remove with the help of a Standard Windows removal technique:

  • Close all programs.
  • Then, Open the Control Panel
  • Tap the cursor on Programs & features.
  • Double-click your McAfee program, then choose Uninstall/Change.
  • Tap Remove and wait for a while.
  • Lastly, Restart your computer to complete the uninstall.
  • Now, the removal process has been completed, and your McAfee products are longer installed on your PC.

(Note: Your PC is no longer protected from viruses and malware when your McAfee software is removed. Ensure that you reinstall your McAfee product quickly to restore security needs.)

Technique 2: Remove Using the McAfee Consumer Product Removal tool (MCPR)

You should only use the MCPR tool in case the stepwise technique given above doesn’t work.

(Note: Make sure that you have downloaded a new copy of MCPR ahead of using it each time. It confirms that you are working on the updated version, which reckons the latest McAfee product with ease. MCPR cleans up only the components required for reinstallation. It is not made to clear up 100% of the components.)

Here are complete steps to remove the McAfee security software from your by using the McAfee Consumer Product Removal Tool:

Visit McAfee’s Homepage.

Find the downloading option and Download the MCPR tool.

In case you have encountered a security warning: Tap Yes> Continue, or Run (based on your version of Windows):

At the McAfee Software Removal display:

  • Tap Next.
  • Tap the cursor on Agree to accept the End User License Agreement (EULA).

At the Security Validation display:

  • Enter the characters exactly as shown on your display. Validation is case-sensitive.
  • Tap Next. This step avoids the accidental use of MCPR.

After the completion of the process, you will be able to go through any one of these alerts. Complete the further steps after seeing either of these two:

  • Removal Complete: in case you have seen this alert on your screen, then the MCPR tool has been completed successfully.
    • You have to Restart your computer for the completion of this removal process.

(Note: The moment your PC restarts, it will no longer be protected against malware and cyberthreats. Make sure that you reinstall your security software up to the possibility to remain secure.)

Cleanup Unsuccessful: In case you have seen this message on your screen, then it means the cleanup has gone wrong; follow the steps to reinstall:

  • Click Restart and wait for a while until your PC comes back to the working state.
  • In case you find Cleanup Unsuccessful again, then ignore it.
  • Restart your PC once again.
  • Make a try to reinstall your McAfee software.

Manual Product license Release

The removal process discussed above helps release your product license so that you can reinstall your software. In case your license is not released yet, and you have encountered a No more license available alert when you make an attempt to reinstall the McAfee Security product. To resolve this problem, follow these detailed instructions:

Then, tap on My Account.

Log in using your McAfee user account credentials.

When redirected to the My Account page:

  • Choose the tab for the PC that you would like to deactivate.
  • Tap Deactivate in the Details section of the chosen PC.
  • On the Confirm deactivation, click Deactivate.

Your McAfee product license is now ready for reuse.

Source: Learn to remove McAfee products from a PC that runs Windows

Monday, February 15, 2021

Learn How to export data from QuickBooks Online | Softwareblogsweb


QuickBooks being on the best performing accounting software worldwide. This successful run of the QuickBooks platform over the web is because of Intuit’s comprehensive development and marketing strategies. QuickBooks has an extensive range of products to serve you to the fullest.

QuickBooks and its outstanding products have made a massive impact on the web audience. However, there are still many faults it has to clear stay impressive between its best competitor productivity software. Here this guide will help you learn the easiest way to export your QuickBooks Online reports and lists. It means that you can download the data you have typed in your file to a local hard drive.

Export Your Reports And Lists

To export various reports and lists into discrete Excel files in a single process in a zip format. Here are the detailed instructions to export your data report or list:

  • Choose the Settings and then Export Data.
  • Open the Reports tab to set the date range.
  • Sum up or erase items from the Reports and Lists tabs by hovering the slider.
  • Then, choose the Export to Excel option.

You’ll see the on-screen instructions with a guarantee that data will be exported.

In case you need to export a different report, Use the following steps to export the reports from the accept; here are the steps to export reports from Quickbooks Online to Excel in case you want to use your files away from the QuickBooks.

Steps to export reports from Quickbooks Online to Excel:

  • Choose the Reports option.
  • Try to find and choose the report you want to export.
  • Navigate to the top of the report, choose the Export icon. Then, choose Export to Excel.
  • Please save the file somewhere you can search for it with ease, like your Downloads folder or your desktop.

(Tip: In case there is any data missing you forget while opening the report in Excel, the file’s in the protected view. In Excel, you’ll need to choose to Enable Editing to view the full report.)

Export non-posting transactions and attachments

The files you will export include the data from posting transactions such as invoices, receipts, bills, etc., balances. Here’s how you can export non-posting information, which reports and lists haven’t included.

Estimates

  • Hover the cursor over the left-side menu to choose Sales (or Invoicing) then All Sales.
  • Open the All Sales section, choose the Filter.
  • Under Type, select Estimates.
  • Adjust your date range and several other filters you require, then Apply.
  • Choose Export to Excel.

Purchase Orders

  • Hover the cursor over the left-side menu to choose Expenses.
  • Choose the Filter.
  • Under Type, select Purchase Order.
  • Adjust the date range and several Filter you need, then Apply.
  • Choose the Export to Excel icon.

Customers Statements

  • Hover the cursor over the left side menu to choose Sales(or Invoicing) then All Sales.
  • Choose the Filter.
  • Under Type, select Statements.
  • Adjust the date range and different kind of filters you require, then choose Apply.
  • Choose the Export to Excel icon.

Attachments

  • Choose the Settings icon from the toolbar.
  • Under Lists, choose Attachments.
  • When you get redirected to the page, choose the attachments you want to export.
  • Choose the Batch Actions, and after that, tap on Export.

(Note: All your attachments will be exported in a zip format.)

Recurring Templates

  • Choose Reports from the menu on the left-hand side.
  • Look out for the Recurring Template List report.
  • Choose the Export icon.

Chart of Accounts

  • Hover the cursor over the left-side menu to choose Reports.
  • Look out for the Account List.
  • Choose the Export icon, then choose Export to Excel.

Products And Services

  • Look at the menu on the left side menu, choose Sales and afterward tap over Product and Services.
  • Choose the More dropdown error, then choose Run Report.
  • Choose the Export to Excel icon.

    Learn More

10 Reasons Why Kaspersky is the Flagship Antivirus Software

  Kaspersky Antivirus & Security products offer you comprehensive protection against malware, viruses, identity theft, and other cyber ...