Wednesday, March 31, 2021

10 Reasons Why Kaspersky is the Flagship Antivirus Software


Kaspersky Antivirus & Security products offer you comprehensive protection against malware, viruses, identity theft, and other cyber threats. Being a well-known antivirus company worldwide, Kaspersky has always worked to its reputation and served millions of users with top-class protection for their devices. The best thing about the Kaspersky security products is the dedicated updates and services it offers within short intervals to enhance its services with a totally effective approach.

Kaspersky Antivirus & Security Products

Kaspersky offers three different protection plans in its comprehensive product line.

Kaspersky Anti-Virus: It is the entry-level product Kaspersky offers you to protect your devices with several essential features to protect from online threats, hackers, and other cybercriminal activities in real-time. Some of the main features you get in the Kaspersky Antivirus are Local scanning and cloud-based machine learning.

Kaspersky Internet Security: This plan includes the support and protection for the Mac and smartphones. Moreover, additional protection is also there to keep you safe from cyber threats like phishing scams and credit card theft.

Kaspersky Total Security: The plan is Kaspersky’s flagship Antivirus subscription plan. With the Total Security plan, you get bonus features and services like a password manager and parental controls.

There are a lot of reasons that make Kaspersky the Flagship Antivirus among the popular brands having millions of active subscription policies worldwide. Following are the 10 Special Reason Why Kaspersky is the Flagship Antivirus:

Secure VPN Connectivity

A virtual private network or VPN helps in connecting to a private connection to a secure network. In case you severely use public Wi-Fi networks, you require a VPN to keep your personal information secure from cybercriminals. Another utility of VPN is that you get stable connectivity with virtual places around the globe to access geographically-restricted content(such as Netflix, Amazon Prime, etc.).

You will get the free edition of Kaspersky Secure VPN Connectivity on purchasing any of the three plans from Kaspersky’s range of antiviruses. But the unlucky thing is you can’t get automatic access to the premium version even in the flagship product, Kaspersky Total Security.

Anti-Malware Tools

For beginners, Kaspersky’s real-time malware protection is excellent. The constant scans keep the system safe by inspecting for suspicious activities and files that can cause concern or harm your online life in any way. In the test conducted by the German Research Institute, the AV-Test lab during the November-December session, Kaspersky scored 100% performance in detecting both “Zero-day” and “widespread” malware along with a single false-positive result.

Safe Money

You can observe a gradual increment in financial cyber thefts. But with Kaspersky’s Safe Money, you can prevent hackers and cybercriminals from stealing your payment credentials. Safe Money has the features to detect your payment action online, and then; the Protect Browser helps you keep you away from the reach of hackers and phishing sites by launching a fresh browser window with a green glow around it. For security concerns, the Protected window of your browser turns off the browser extensions and syncing, if any.

Safe Money’s On-Screen Keyboard helps you in avoiding the keyloggers as you can enter all your payment information safely over that onscreen keyboard, and the keyloggers will become unable to record your keystrokes.

Password Manager

Kaspersky Password Manager helps you in generating strong passwords, saving them in totally encrypted storage, and it also logs you into your account automatically whenever you will try to visit that site.

By purchasing the Kaspersky Anti-Virus and Kaspersky Internet Security, you get the free version of Kaspersky Password Manager (which you can download in a familiar file format from Kaspersky’s official website). Unluckily, in the free version, you can only store up to 15 passwords. But, With the Kaspersky Total Security Plan, you get complete access to the premium version of Password Manager.

Kaspersky Cloud Protection

To use this feature, you have to accept the Kaspersky Security Network agreement, where you can read about the kind of information Kaspersky will collect from you.

The agreement gives you all the explanations that using the Cloud Protection feature, Kaspersky can collect your personal data, including:

  • The websites you visited in the desired time-period.
  • Your device’s unique ID number
  • The Apps that are running on your device

Privacy Cleaner

This feature is available in all three plans Kaspersky offers in its Antivirus range. The Privacy Cleaner feature lets you erase “activity traces” from your PC. Your PC components like the OS and internet browsers keep records of your daily activities throughout the day. It is good that the PC logs your activities but can be a reason to worry if the cybercriminals find the method to access this data anyhow. Here, Privacy Cleaner helps you by clearing your browser history and activity logs, temporary files folder, and the prefetch cache memory, which saves copies of web-pages you have visited in your previous browsing sessions for fast access.

Basic Protection

Kaspersky offers you Basic protection with the help of the Kaspersky Anti-Virus. It’s really important for a famous Antivirus brand to provide people with a useful set of Basic protection features in its entry-level products. Following are the features that Kaspersky Antivirus has to provide you the Basic protection:

  • Real-time security against all kinds of malware such as viruses, spyware, and crucial trojans
  • Fast, complete, customizable, and scheduled scans
  • On-Screen Keyboard
  • Cloud Security
  • Privacy Cleaner
  • Vulnerability Scan
  • Rescue Disk
  • MS Windows Troubleshooting
  • The free version of Password Manager
  • Secure VPN Connectivity

Kaspersky Antivirus Ease-of-Use

Kaspersky says its latest version is 15% quicker, and its installation process completes within half of the standard time for installation. The point to be noted is that the software runs very light on my system’s resources. You can install Kaspersky in just a few taps. The smooth User-interface of Kaspersky leads you through all the features of the software with ease.

Kaspersky Antivirus Smartphone App

The Kaspersky Antivirus Smartphone application is only available on the Google Play Store for Android Users, while the Kaspersky Security Cloud iOS application is available on the Apple App Store. Both the applications are quite different from each other.


With Kaspersky Antivirus for Android, you get the following useful features:

On-demand malware scans

Theft Protection

  • Locate your smartphone through your My Kaspersky account option.
  • Wipe your saved information on the smartphone.
  • Set the alarm.
  • Click an image of a person who tries to use your phone without your consent.
  • Lock your smartphone in case someone removes the SIM.
  • Lock your phone in case anyone attempts to uninstall the Kaspersky Antivirus from your smartphone.

Bonus features in the premium version:

  • Real-time Malware Protection: Prevents all kinds of malware in real-time.
  • App Lock: Particular applications for lock smartphones with a PIN, fingerprint, or security pattern.
  • Web Protection: keeps you protected from phishing sites and dangerous cybercriminals.

Customer Support

Kaspersky offers you prominent support with the help of the following features and services:

  • Frequently Asked Questions tab
  • 24/7 Email Service (Submitted through a web form)
  • Live Chat
  • Social Media pages
  • Community forums

Final Thoughts

Kaspersky unarguably is one of the best Antivirus brands that offer features like real-time malware protection, Secure VPN Connectivity, Cloud protection, and more to protect your devices. We hope you will find this article helpful while understanding the comprehensive features of Kaspersky that make it the flagship antivirus brand among the popular antiviruses.

Source: 10 Reasons Why Kaspersky is the Flagship Antivirus Software

Friday, March 26, 2021

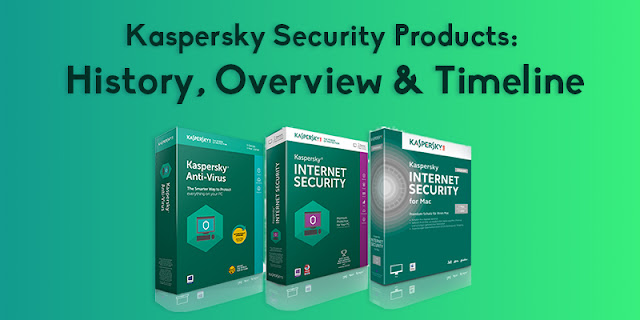
Kaspersky Security Products: History, Overview & Timeline


Kaspersky is one of those iconic names amongst the cybersecurity brands worldwide that offers comprehensive protection against viruses, malware, identity thefts, and other outrageous cyber threats for your devices. It is operational in about 200 nations and has 35 branch offices in 31 nations. With about 3800 highly-qualified professionals at work, Kaspersky gives all-around security to your devices.

Overview

Kaspersky was first introduced to the world in 1997. Kaspersky’s advanced threat intelligence and security specialization are gradually changing into comprehensive protection products and services. With these products and services, Kaspersky secures the functions and environment of Businesses, crucial infrastructure, governments, and consumers worldwide. The company’s advanced protection portfolio comprises top-class endpoint security and numerous advanced security products and services to tackle sophisticated and outrageous threats. With nearly 400 million active user policies, Kaspersky products are protecting the users’ online life every day.

Foundation of Kaspersky

The first edition of Kaspersky Lab’s antivirus software was developed by Eugene Kaspersky in 1989 when the Cascade Virus spread worldwide. The early editions were based on only 40 virus definitions and were tested by sharing with friends and family members. The software development by Eugene stayed continuous at KAMI, and soon an Anti Viral Toolkit Pro (AVP) product launched in 1992. Eugene got recognition in 1994 after Hamburg University awarded Eugene’s software in an analytical competition.

In 1997, Eugene, his wife Natalya, and Alexy De-Monderik established Kaspersky Lab after leaving KAMI. They formed this company to continue the development of the antivirus product, then called AVP. They had to change the company name AVP to Kaspersky Anti-Virus after an American firm registered the AVP trademark in the US.

In 1998, a student from Taiwan launched a virus, “CIH.” During the first 21 days of the Virus spread, Kaspersky Lab’s AVP was found to be the only software to remove it. This leads to an increment in the demand in the market and eventually led to sync the deals with security firms in Japan, Finland, and Germany to integrate AVP into their software.

WIRED mentioned the Kaspersky software “advanced for the time.” One such example was the first software to check for the viruses in an isolated quarantine. Kaspersky’s revenue took a boost of 280 percent between the years 1998 and 2000 that included 60 percent of that revenue came from foreign sales. Soon, Kaspersky launched its offices in various countries like UK, Poland, Holland, and China and, after some stable years, also made quite a good expansion by adding Germany, France, the US, and Japan.

At the beginning of 2000, the cybersecurity brand had only 65 workers and was selling its products in more than 40 countries. Kaspersky launched new offices in South East Asia and the Middle East in 2008 and South Africa in 2009, and soon it also expanded to India, the Middle East, and Africa in 2010.

General Atlantic purchased a twenty percent share of Kaspersky Lab for $200 million, expecting to help the company to become public. After some time, the decision was taken to stay private, and Kaspersky paid for the shares acquired by General Atlantic to re-acquire the shares again.

Several executive departures took place in the year 2011, and 2014 after the re-purchasing of shares, the main cause of these departures were disputes over going public and over Eugene’s management style.

In August month of 2015, two former Kaspersky workers filed the case that the firm has shown the modified files into the VirusTotal antivirus storage to trick application from Kaspersky rivals into triggering false positives in virus and malware scans. A right motive is that Eugene allegedly was furious at rivals perceived to be injustice-free-riding on Kaspersky’s malware inventories via the open-source VirusTotal database. The company refused to agree with the allegations.

On his personal blog, Eugene Kaspersky gave a comparison for the accusations of unsubstantiated conspiracy theories. Reuters followed up by publishing leaked emails reportedly from Kaspersky, alluding to “falsies” and “rubbing out” foreign competitors; Kaspersky Lab announced the emails “may not be legitimate and were obtained from unknown sources that have an improper agenda.”

In 2016, Kaspersky executive Ruslan Stoyanov got into custody by Russian Authorities on the charges of improperly dating his work at Kaspersky. In 2019, he was given a conviction of treason.

Kaspersky: Partners

The Kaspersky Anti-Virus engine also gives the privilege to other protection vendors to empower their products effectively. Some of those vendors are Check Point, Bluecoat, Juniper Networks, Netintelligence, Clearswift, FrontBridge, Netasq, Wedge Networks, and more. If taken on a scale, over 120 companies have purchased the licenses technology from Kaspersky Lab. Kaspersky Lab also has numerous partnerships with these technology companies.

Bans & Reports

Since 2015, Kaspersky was reported to have close similarities to the Russian government by several western media outlets, and at last, the US government itself. In 2017, President Donald Trump signed the legislation to ban software of Kaspersky on desktops used in the government sectors. US government institutions were not allowed to buy and install Kaspersky software on their desktops and other devices.

Conclusion

Kaspersky has always been listed as one of the best antivirus and security providers in the field of cybersecurity. We hope this article will help you in understanding the history and recent timeline of Kaspersky.

Source: SoftwareBlogsWeb

Wednesday, March 17, 2021

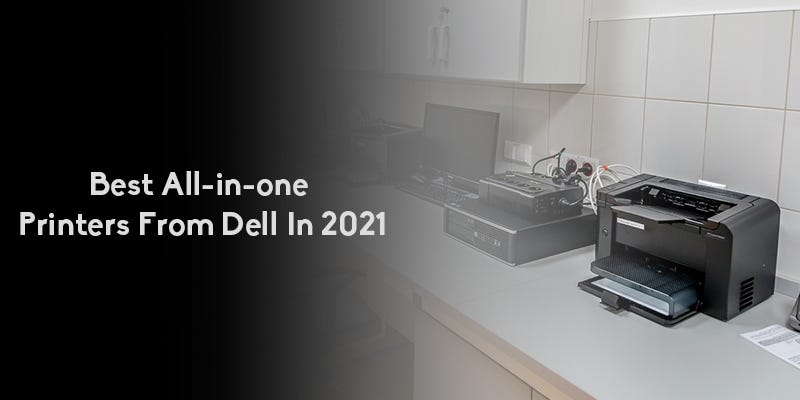
Best All-in-one Printers From Dell In 2021

If you’ve been following the technological trends for the last five decades, you might have witnessed how modern technology is moving towards compactness. In this endeavor, computers and printers are becoming extra snappy and diminutive. From Dell’s line of modern printers, here is a look at the best Dell All-in-one printers in 2021.

We will be listing down the best all-in-one printers and their best features and specs. So strap your seatbelts and take this ride inside the best all-in-one printers from dell in 2021.

Dell V725w ($170)

The Dell V725w is a wireless Inkjet printer that prints at an incredible speed of up to 35ppm for monochrome, 30ppm for color, and 10ppm in color (ISO speed). The printer ticks all the right dots when it comes to purchasing an all-in-one printer on a budget. Unlike regular 3-in-one printer machines, the Dell V725w is one step ahead of its peers as it offers 4-in-one printer capability without crossing the budget line. Along with the 4-in-one function, the printer also comes with a 2.4-inch color LCD, wirelessly connectivity, and the list never stops. Let’s see some of the specs of the Dell V725w and how much it offers with a price tag of $170.00.

Printer Type

All-in-One Wireless Inkjet Printer

Printing

  • Up to 35 ppm for monochrome.
  • Up to 30 ppm for color.
  • Resolution up to 1200 x 1200 dpi.

Memory

256 MB

Network Support

  • Wireless
  • Ethernet
  • Mobile printing
  • AirPrint

Paper handling

A4, B5, A5, A6, postcard, Hagaki card, L, 2L, Custom Size, Plain, Premium Plain, Rich Color, Letterhead, Labels, Envelope, Heavy Plain, Heavy Rich Color, Business Card, Glossy Photo, Matte Photo, Inkjet Matte Brochure Light, Inkjet Matte Brochure Heavy, Inkjet Glossy Brochure Light, Inkjet Glossy Brochure Heavy, Transparency, and Iron-On Transfer.

Dell B5465dnf

Now we are taking out the big guns, and this gigantic multifunctional printer has everything you’d expect from a premium level printer. The Dell B5465dnf is a comprehensive machine that prints, scans, copies, and faxes with a blazing fast speed of up to 66 ppm. The automatic document feeder also supports duplex scanning with an average speed of 70 spm. If you are looking for long-term usage or want to save money on cartridges, selecting the Dell B5465dnf would be the best possible option for you and your business. Let’s look at some of the features and specs of Dell B5465dnf.

Printer Type

4-in-1 Laser printer

Printing

  • Up to 66 ppm
  • Printing and copying speed up to 70 spm.
  • Printing resolution up to 1200x1200 dpi.

Memory

128 MB

Network Support

  • Gigabit Ethernet connectivity.
  • External wireless adapter(optional)
  • Wi-Fi.

Paper handling

A4, A5, A6, Executive, Folio, JIS B5, Legal, US Letter, Oficio (Mexico), Statement, Universal, B5, Envelope, DL Envelope, 7 3/4 Envelope (Monarch), 9 Envelope, 10 Envelope, Universal (only supported in standard output bin and Hi-Cap Output Option), Card stock, Dual Web Labels, Envelopes (smooth), Integrated Labels, Paper Labels, Plain Paper, Transparencies, Bond, Letterhead, Preprinted, Coloured Paper, Custom, Light, Heavy, Rough/ Cotton, Recycled.

Dell 5535dn Multifunction Laser Printer

The Dell 5535dn is another all-in-one printer that offers a wide range of features and fulfills large enterprises’ requirements that need daily printing. Visually, the printer looks like a complicated machine that requires special training to operate. But the dual-tone exterior and clear-cut design are for deceiving, and managing the devices is super easy and convenient. The Dell 5535dn can print 275,000 pages monthly with a resolution of up to 200x1200 dpi, making your prints crisp and vibrant. As an all-in-one printer, the Dell 5535dn works as a standalone faxing machine that quickly sends faxes to your contacts. Let’s see some of the features of Dell 5535dn and where it stands in the race of the best all-in-one printers of Dell.

Printer Type

Multifunction Laser Printing

Printing

  • 55 pages per minute.
  • Printing and copying speed up to 55 pages per minute.
  • Printing resolution up to 1200x1200 dpi.

Memory

256 MB standard

Network Support

  • Ethernet
  • USB-B (high-speed) device port

Plain paper, bond, letterhead, preprinted, colored paper, card stock, paper labels, transparencies, smooth and rough envelopes, light and heavy paper, recycled paper, rough/cotton paper (not duplexable), A4, A5, A6, executive, folio, JIS B5, Oficio, statement, universal, B5 envelope C5 envelope, DL envelope, Monarch envelope.

Final thoughts

Dell has proven its worth by manufacturing printers for both office-home and big corporations. The company has been actively involved in creating the best technologies for people who want to experience innovations without paying a large sum.

Dell has an affordable list of printers that cater to small kids who want to complete their art projects for school and large corporations who need a printer that can print 30,000+ pages per month.

With so many features and an economical price tag, you can get your hands on a premium printer by paying less than half of what you would pay for a mainstream printer. Dell fits right into the zone of affordability and practicality because it makes products for people of all kinds.


Originally published at https://softwareblogsweb.com.

Friday, March 12, 2021

Ultimate Guide to Uninstall the CorelDRAW Products


Here you can find the instruction to uninstall the various CorelDRAW products. These stepwise procedures are useful in uninstalling CorelDRAW, Painter, PaintShop Pro, VideoStudio, WordPerfect, WinDVD, AfterShot, PhotoImpact, CAD, CorelDRAW Technical Suite, DVD MovieFactory.

Uninstall Process for Windows Systems

In case you need to uninstall a Corel PC-based application from your device, you must use these stepwise procedures with the help of the Windows Add or Remove options in the Programs menu.

Ensure that the program is completely closed before you start the process to uninstall any of the productivity applications of CorelDRAW. The best method to do this is by clicking the close symbol available on the top-most corner of the application.

In case you have Windows 8 OS, then follow these steps:

  • Move-in from the right edge of the window screen, and then tap the cursor over the Search section.
  • Access the control panel window with the search section's help and then tap the cursor on the Control Panel option.
  • In the View By menu, look out for the Large Icons, and then tap the cursor over the Programs and Features option.
  • Tap the cursor again on the program option, and then double-click the Uninstall option.

Now, you have successfully uninstalled the desired Corel Draw application from your device.

In case you are using the Windows Vista/Windows 7, then these steps will help you to uninstall the CorelDRAW product from your desktop:

  • Tap the cursor over the Start option, then choose Control Panel.
  • Choose the Programs option and then tap the cursor on the Programs and Features option.
  • Now, you have to select the program you would like to remove and then tap twice on Uninstall option.

You have now successfully uninstalled the CorelDRAW product from your Windows Vista/Windows 7 PC.

In case you have Windows XP OS, then these instructions will be useful for you while uninstalling any of the applications mentioned at the starting of this article:

  • Double-tap on the Start option and then choose the Control Panel.
  • Then, choose the Add or Remove Programs option from the main interface.
  • After that, select the program you would like to remove and tap the cursor over the Change or Remove option.
  • Double-tap on the Uninstall option in the confirmation dialog on your screen to complete the uninstallation process.

Now, you have completed the uninstall process for your CorelDRAW application over Windows XP.

For the Mac Desktops

  • Move the desired application from the main Applications folder to the Recycle bin.
  • Now, select the navigation button, tap it and then tap the cursor over the Empty Trash option.

(Tip: In case you change your intention for the task, ahead of erasing the Trash, choose the app in the Recycle bin folder, then select the File option and then tap your cursor on the Put Back option.)

Alert: While you perform the process to erase the Trash, the application is permanently removed from your Mac desktop.

For Linux Systems

In case you have Ubuntu Linux installed on your desktop:

  • Launch the Ubuntu Software Center by tapping the cursor over the suitcase in the Unity Launcher.
  • Tap the cursor on the "Installed" option on the Tools menu at the top-most section of the interface.
  • Tap the cursor on the category option beneath the program you would like to locate the installed software.

(Tip: You can find your installed software using the Search tab in the right-side corner of the window.)

  • When you find the desired software, tap on it to show the options. Tap on the "More Info" to see further information related to that installed application.
  • Tap the cursor the Remove option.

In case you have Fedora Linux installed on your desktop:

  • Tap over the Applications option, then on the System Tools.
  • After that, you have to select the Terminal to launch the command line.
  • Enter the text “remove the application.”

(Tip: In case you are not sure for the real name of installation you want to execute, you can find your installed repositories for a keyword: su -c ‘yum search keyword

Here the keyword refers to a simple word you wanted to find among the names and descriptions of applications in the existing repositories.)

When you use the yum remove command, you will get the on-screen instructions and queries for the computer's root password—Enter the root password and tap the Enter key for a moment. You will be unable to see the password when you type it. The terminal will begin to offer you details related to the apps and finish with this is ok (Yes or No):. In case of the conditions in which the installed application is running, you will use the on-screen instructions to remove it.

In case you would continue with the removal process for the installed application, Enter: yes.

The terminal removes the essential documents and finishes the uninstallation of your application.

CorelDRAW Technical Suite 2019: Manually Uninstall

Use this process for uninstalling the CorelDRAW Technical Suite 2019, which includes all sites where the files may leave after an uninstalling attempt failure:

  • Firstly, you have to restart your OS to make sure that all tasks are neatly closed and finish any of the unnoticed Windows updates successfully.
  • In Windows Control Panel, tap the cursor on Uninstall an application.
  • Remove these programs in this particular order in case you have installed them: Corel Graphics - Windows Shell Extension, Ghostscript GPL 8.64, CorelDRAW Technical Suite 2019, XVL Player / XVL Player Pro, XVL Studio 3D Corel Edition.
  • The best suggestion by which you can inspect the installation process and user folders and the user sites over the registry for documents and remaining entries. In case they have not been uninstalled during the uninstalling process, then you have to uninstall them manually.


Source: SoftwareBlogsWeb

Tuesday, March 9, 2021

Adobe Acrobat: Brief History of Productivity Tool Range

 Adobe Acrobat is a productivity tool range developed by Adobe Inc. which helps to view, create, customize, personalize, print, and arrange files in .pdf format. This complete productivity tool range includes Acrobat Reader, Acrobat, and Acrobat.com to offer a comprehensive solution for the essential programs people require in the office and other writing or presentation purposes.

You can download the preliminary Acrobat Reader, free of cost for compatible computers and smartphones. It helps you to view, print, and annotate PDF documents. In case you want some more personalization and additional features, you can take the subscription of "Premium" services in the paid version of Adobe Reader. The commercial, non-free Acrobat, is also available only for MS Windows & macOS to create, change, transform, fill digital signature, setting encryption, for exporting and publishing .pdf format files.

Adobe Acrobat: History

Adobe Acrobat was first introduced in 1993, and soon it became a competition for the existing products like Common Ground, Envoy, Folio Views, Replica, etc. Proprietary formats in the race to develop digital documents. Adobe changed the name of many Acrobat products to merge, split, and discontinue their image with Adobe in the technical market. From the beginning, the main Acrobat's main products were Acrobat Reader, and Acrobat Exchange became "Reader" and "Acrobat," respectively.

In 1999, Acrobat.com added some web services with names starting with "Acrobat," but eventually, "Acrobat.com" was leveled down from the representative name of the productivity tool range to one of those productivity services.

By the end of March 2015, the Acrobat productivity range had the following products: Acrobat XI Pro & Standard, Reader XI, FormsCentral, EchoSign, Acrobat.com, Portable Document Format Pack, and Send.

Unlike many Adobe products, many productive tools in the Adobe Creative Suite range, the Acrobat products have no official icons displaying two letters enclosed in a colored rectangle.

Introduction to the Adobe Acrobat Document Cloud

In April month of 2015, Adobe revealed the "Document Cloud" branding to earn recognition for the inclusion of the cloud storage and the software as a service model. Applications that came with this branding were given a "DC" suffix. In addition, "Reader" got his name back as "Acrobat Reader." After adding the Document Cloud, the Acrobat.com service turned off as all of their features got integrations within the desktop or Smartphone applications.

The User Interface encountered a lot of changes as Acrobat was introduced. It was compatible with Windows 7 & higher OS versions and OS X 10.9 & higher. From DC 2015, the Acrobat productivity products range became available in two tracks, the original track or Classic and the Continuous track. The Classic track releases were probably on the schedule after every three months. Still, there were no latest features, while Continuous track got more updates issued infrequent updates and implementations in a silent and automatic manner.

The final pre-DC product, Acrobat XI, got an update to11.0.23 version on November 14, 2017, and its support for this service ended on the date October 15, 2017. Till August 2018, the main products of Acrobat productivity range has:

Acrobat Pro DC, Acrobat Standard DC, Acrobat Reader DC, Fill & Sign application, Sign, & Scan.

Security For Your Information

An extensive line of security bulletins for most Adobe products is always visible over the Security bulletins and advisories columns. Specifically, the overall history of the security updates for all of the Adobe Acrobat products has been upgraded to public visibility.

With the release of Version 3.02, Acrobat Reader added support for JavaScript. This functionality allows a PDF document creator to add code that performs the execution. Malicious files in .pdf format, which tries to strike security vulnerabilities, can be joined with the links on web pages or distributed as emails.

Usability & Benefits of Adobe Acrobat

Adobe Acrobat enhances the workflow of your team as it helps you maintain a stable connection between you and your team. It facilitates the connectivity across desktop, smartphone, and web and lets the work done with any interruptions.

The gradually growing requirements are helping us in evolving the methods of working. These conditions lead to carry out improvements and the addition of features to a brand like Adobe Acrobat. When you purchase Adobe Acrobat DC, you get the latest features as soon as the product release happens.

Why is Adobe Acrobat the best choice for you?

Adobe Acrobat has more than five million active policies for organizations worldwide. It is helping all of these organizations by easing their documental works like creating and editing the PDFs, conversion of these documents into the Microsoft Office formats, and more when you perform your task from remote areas or home. It requires applications that can help you in empowering the activities and keeping your business in motion.

Adobe Acrobat offers an extensive range of products, including Acrobat Pro DC, Acrobat Standard DC, Creative Cloud, Fill & Sign, etc., to enhance your capabilities to create, view, print, and more while working with the documents online. The pricing and plans are available for individuals, small teams, and enterprises.

Here are some of the comprehensive features of Adobe Acrobat (Pro) offers you:

  • Feature to create PDF files and export them in different types of document formats such as XLS, .doc, or .ppt.
  • It helps in editing the written information and pictures directly in your documents having a .pdf format.
  • It helps in conducting comparisons between two different versions of a single document in .pdf format.
  • You can add more licenses as your team builds up.
  • Integration with business tools such as Microsoft 365 and SharePoint.
  • It provides MS Information Protection solutions and Azura Data Protection and Office 365 to protect the Open PDFs.
  • Feature to help in assigning multiple admins for the groups you have created for members, product, deployment, and support team.
  • It offers up to 100 GB of cloud storage where you can store your sensitive data and documents. It also provides you productivity programs like the Adobe Portfolio, Adobe Fonts, etc.


References: softwareblogsweb

Friday, March 5, 2021

Ultimate Guide to Download & Install Adobe Acrobat


Adobe Acrobat is a group of productive software and online services created by Adobe Inc. There are several types of productivity applications and solutions for both individuals and businesses. You can download applications for different features and utility available on popular platforms like Google Play Store, Apple Apps Store, or download the APK or Zip files from Adobe’s products list section on the main Website. This article is the Ultimate Guide to help you download & Install Adobe Acrobat Products.

Download & Install Creative Cloud

Follow these detailed instructions to download the Creative Cloud on your Desktop:

  • Visit the official Website of Adobe Acrobat.
  • Hover the cursor over the All Apps icon, then tap it.
  • Choose the Creative Cloud option from there.
  • Then, you will be redirected to a fresh tab, where you have to again click on the All apps icon.
  • Next, look out for the option Creative Cloud and tap your cursor over the download button given the front of that option.
  • As you click on the download button, a fresh will open, suggesting you follow the instructions given below to install Creative Cloud.
  • After the download completes, save the downloaded file in a suitable folder or Desktop.
  • You have successfully downloaded the Creative Cloud on your Desktop.

As your download completes, open the folder where you have saved the file and use the steps given below to continue the installation process:

  • Tap twice over the file you have downloaded.
  • A dialog box will come over your screen; you will have to click on the Run button to continue.
  • After the processing gets complete, tap open.
  • Sign in with your account credentials, or in case you don’t have an existing account, then create one by clicking the Sign-Up button.
  • After that, read the end-user agreement thoroughly and select the agree button to proceed.
  • You have now successfully installed the Creative Cloud over your Desktop.

Steps to download the Creative Cloud on your Android Smartphones:

  • Touch Google Play Store application to launch it on your Android smartphones.
  • Tap on the Search Tab to type the text “Adobe Creative Cloud.”
  • You will then be redirected to a list of applications and choose the app “Adobe Creative Cloud.”
  • Tap once on the install button and wait for a moment until the downloading process completes.
  • As soon as the downloading process completes, tap on the open button.
  • Log in with your Adobe account credentials.
  • In case you don’t have an Adobe account then, sign up for one.
  • You have successfully completed the installation process.

Download & Install Adobe Acrobat 2020

Ahead of downloading the Acrobat Pro 2020 or Acrobat Standard 2020, you have to download the Acrobat installer. After downloading the installer, you are now all set to initiate the process to download the Acrobat Pro 2020 or Acrobat Standard 2020.

Detailed instructions to download the Adobe Acrobat 2020 for Windows:

  • Go to Adobe Acrobat’s official Website.
  • Tap on the All Apps icon.
  • Choose the Adobe Acrobat DC Pro from the sorted list.
  • Tap on the download button.
  • You will be directed to a resh window; you will see the option to download the older version. Tap it.
  • There you will see the downloading links for Acrobat Pro 2020 or Acrobat Standard 2020.
  • As soon as the downloading process completes, locate the file on your Desktop to find it with ease.
  • You have now successfully downloaded the zip file on your Desktop.

Use the following steps to continue with the installation for Windows:

  • Copy the downloaded zip file and then paste it into a different folder.
  • Now use the left-click to open the menu and select the extract the zip file.
  • Use the navigation tab to find the Setup.exe file.
  • To initiate the installing process, tap the cursor twice on the Setup.exe file.
  • Go with the prompts to finish the installation procedure.
  • A dialog box will come over your screen; choose the Run option.

Now you successfully download the Acrobat Pro 2020 for your Windows OS.

Follow the below-given instructions to Install the Adobe Acrobat 2020 for macOS.

  • Open the folder where you have saved the downloaded DMG file.
  • Tap the cursor twice on the downloaded DMG file to mount the Acrobat installer volume.
  • Launch the mounted Acrobat installer volume.
  • Use the navigation tab to find the Acrobat DC installer. Pkg in the volume.
  • Tap on the Run option.
  • Follow the prompts asking to follow the procedure for the completion of the installation process.
  • After completing the prompts, the message “ Installation completed” will appear on your screen.

Download & Install Adobe Photoshop

Following are the steps to download Adobe Photoshop on your Desktop:

  • Go to the official Website of Adobe Acrobat.
  • Hover the cursor over the All Apps icon.
  • Select the Adobe Photoshop option from there.
  • Then, you will be directed to a fresh tab, where again, you have to tap the cursor over the All apps icon.
  • Next, look out for Adobe Photoshop options and click on the download button given the front of that option.
  • As you click on the download button, a fresh will open, suggesting you follow the steps given below to install Adobe Photoshop.
  • After the download completes, save the downloaded file in a suitable folder or Desktop.
  • You have successfully downloaded Adobe Photoshop on your Desktop.

As your download completes, navigate to the folder where you have saved the file and continue with the stepwise installation process given below.

Here are the easy steps to install Adobe Photoshop on your Desktop:

  • Double-click over the file you have downloaded.
  • A dialog box will come over your screen; you will have to tap on the Run button to continue.
  • After the processing gets complete, tap open.
  • Sign in with your account credentials, or in case you don’t have an existing account, then create one by clicking the Sign-Up button.
  • After that, read the end-user agreement thoroughly and select the agree button to proceed.
  • You have now successfully installed Adobe Photoshop over your Desktop.

Instructions to download Adobe Photoshop on your Android Smartphones:

  • Touch the Google Play Store app to launch it on your Android smartphones.
  • Click on the Search Tab to type the text “Adobe Photoshop.”
  • You will then be redirected to a list of applications and select the app “Adobe Photoshop.”
  • Click on the install application option and then wait for a moment until the downloading process completes.
  • As soon as the downloading process completes, click on the open button.
  • Log in with your Adobe account details.
  • In case you don’t have an Adobe account then, create one.
  • You have successfully completed the installation procedure.

Originally published at https://softwareblogsweb.com.

Wednesday, March 3, 2021

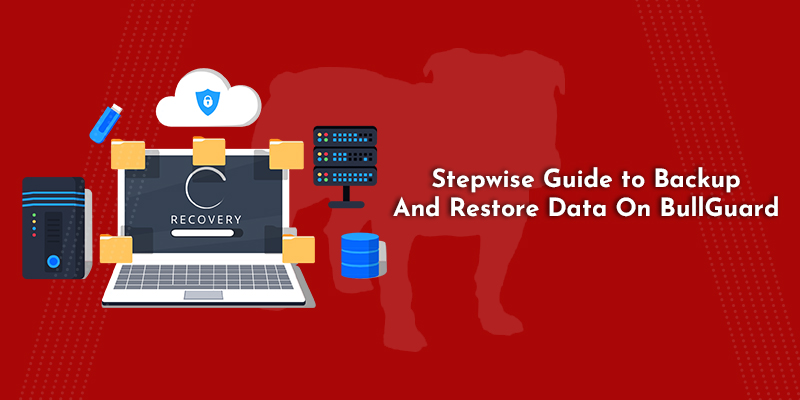
Stepwise Guide to Backup And Restore Data On BullGuard


The primary backup the window gives you access to all the vital module functions - to facilitate several functions like managing backup profiles, restoring files, and accessing the saved data directly.

Add to Backup: It helps you add the file you have chosen to your backup profile; it asks you to select one if you have too many.

Start Backup: It helps you run the chosen Back up profile.

Manage Profiles: It allows you to make changes in the Backup profiles and convert them according to your particular requirements.

Restore: It helps you start the Restore guide that gives you the authority to retrieve the backed-up data.

Settings: It helps you launch a new section to where you can select if BullGuard runs customized backups or restores tasks.

Introduction to BullGuard Backup

BullGuard Backup is the advanced online backup solution to keep your electronic valuables safe, as it gives you the authority to retrieve and access all the things, regardless of the possible outcomes that can affect your computer.

Backup is simply the copies of important information which you don’t want to risk losing. The most convenient way to take the backup is by creating an online backup. In case you store your documents online, they will be sealed in protection from any type of damage to both your PC and networks.

Setting up the Backup profiles

Including the customized files or e-mail backup profiles, you can generate backups for the Windows common locations like the Documents folder, Photos, Music, Videos, and more.

To set up your backup profiles, tap on the drop-down menu options from the Backup tab in the main app and screen and select the Manage Profiles option. It will direct you to the backup profiles window. In case you already have an existing profile, you can choose it from the list on the left side and change its settings by using options given on the right side of the window. Or You can follow these straightforward steps to create a new backup profile:

1.    Once you tap on the Add the Profile button, you will see a field where you can enter the new profile’s name. Tap Add to create a new profile.

2.    Select the type of data you want to back up by checking one or more of the options on the right side from the What tab.

1.    Remember that while you select Documents, Photos, Music, Videos, or Desktop. BullGuard will look for the files in the default locations of your operating system. In case you have stored files in different locations that you want to back up, select the Other files or folders option and add them up by the manual method of tapping the cursor over the Edit button near the option.

2.    Edit: This button helps you to launch the new window, allows you to edit the backup profile characteristics.

3.    Add: It helps you open a fresh window that allows you to select files or folders you want to include in the backup profile.

4.    Select filters: This button helps you in defining a particular type of filter, so BullGuard will only take the backup of the required files and folders, which eventually saves your time and space.

3.    This step requires you to select the location you want to store the backup in from the Where tab. You can store the backup on various productivity tools like DropboxOne Drive, or Google Drive, on a CD/DVD, on the local PC (with the help of an external hard disk), or on a network location.

(Note: Taking the backup from files into Dropbox, One Drive, or Google Drive requires an account associated with that productivity tool. In case you don’t have any, create one through the BullGuard Backup interface.)

1.    The Backup profiles can be taken by a schedule, either be started by using the manual options when the conditions look suitable for you or to back up important files on a regular basis avoiding data loss. It can be performed using the When tab.

2.    The How tab (advanced backup settings) gives you the authority to perform tasks like customizing your profile by including special features like encryption, versioning, and backup compressing, etc.

The profile will now come in the profile list accessible from the Manage profile folder.

Restore Your Data With BullGuard

The Restore feature gives you the authority to retrieve the data you have saved in the backup storage and copy it to its previous location you have taken the back up from or to another location on your PC.

For restoring the data, you will have to read the restore guide that offers you the authority to select the data type, location, and folder where you want the data restored. You can start the process to restore the data by tapping the cursor over the Restore your data option from the drop-down options of Backup available in the main BullGuard interface. Here are the steps to complete the restoration process:

1.    Once you tap the cursor on the  Restore button, you will be requested to choose the location where the files have been previously backed up- local or an online drive. Tap on Next after choosing the right location.

2.    In case you chose a local/network computer or driver, you will have to browse to the location of the backup. For files you have saved as a backup in Dropbox, you will have to perform authentication to your Dropbox account and then search to the file’s location. Tap the cursor on Next to continue.

3.    In the fresh window, you will have to choose the files and folders that you need to restore. Tap Next in case, you have completed selecting the files to restore.

4.    In the new tab, you will have to choose a location to save the retrieved files. Tap the cursor over the start button to have BullGuard retrieve your data.

Please try not to disturb the retrieval process until the successful completion. When the Restoring process is complete, you will get the notification by opening the message center using the algorithm: Message Centre > Backup > Activity.

Source: Software Blogs Web


10 Reasons Why Kaspersky is the Flagship Antivirus Software
  Kaspersky Antivirus & Security products offer you comprehensive protection against malware, viruses, identity theft, and other cyber ...